Embroidery machine, CNC (Tajima TEJT II-C NEO 1501) ID:144
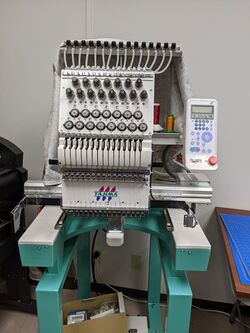 | |
| Type | CNC embroidery machine |
| Make/Model | Tajima TEJT II-C NEO 1501 |
| Serial number | 3127 |
| Original owner | Protospace |
| Loan status | N/A |
| Arrival date | Feb 9th, 2021 |
| Location | Sewing Room |
| Functional status | Waiting for training material |
| Usage permissions | ?? |
| Certification | Course |
| Wiki-ID | 144 |
| Label | 1.0" 1.5" 2.0" |
Documentation
Specs
- Single-head 15-needle
- 75/11 size DBxK5 round shank needles
- Thread: 40-weight top, 80-weight bobbin
- Work Envelope Dimensions:
- 19.5” L x 14” D large hoop
- up to 1,200 stitches per minute
- Cost: $8500.00
- Power Supply: 120V, max 220 Watts
- Overall Dimensions:
- 32" Door Clearance
- 26.25" Width x 31.75" Depth x 31.5" Tall without stand (W 665mm * L 805mm * H 796 mm)
- 170 lb. with stand
Materials
Bring your own backing.
Stick with 40wt polyester thread, others break a lot.
Supplies available at: Where to source tools and materials#Textiles
Bobbin
L-type bobbin, takes 80wt thread, threads clockwise out under spring and through metal eyelet, leave 2" tail. Observe lubing requirements before reinserting.
Quick Start
| This "cheat sheet" is not a substitute for proper training and confidence in operating this very nice and expensive machine! If you're feeling unsure, ask for help! |
- Digitize your file - software magic process steps go here - and copy onto special USB 1.0 stick
- Set up your material/workpiece and backing on the appropriate hoop or fixture, drum tight and evenly tensioned
- Insert stick into USB port at rear left side of machine
- Scan card on lockout device to power on Tajima
- Choose your frame type at "Frame:"
- flat: the various flat circular green frames
- cap: the round metal hat torture device
- "Initialize: On" allows the machine to home at calibrate, why would you ever turn this off?
- Load your file from USB stick by pressing the "Data" button and scrolling through the list
- "Color change:"
- auto: if you'd like the machine to just run your color order
- manual: if you need to change fabrics or positions between colors/operations - STOP HERE, INSTRUCTIONS for "manual color change" are INCOMPLETE/UNTESTED! GET DEMO/HELP WITH THIS! DO NOT PASS THIS STEP, DO NOT PRESS GO, DO NOT COLLECT CRASHED MACHINE AND BROKEN NEEDLE - do update these instructions once you get it reliably figured out though...
- Type in your color change order - note this is in hexadecimal so 1-9 then 10 is typed using the "+10" button then 0 and shows up as A, so 11 is "+10" then 1 and will show up as B, etc.
- Set the frame position by running a "Trace", it uses the needle/color shown on the bottom right corner
- Make super extra double sure that your "Trace" will not crash the machine into the frame, and that the design will end up where you want it on your workpiece
- Adjust the speed slider to the slower 1/3rd
- Press "Start"
Rethreading A needle
To prepare thread: put new thread under NO TENSION and cut at an angle. This makes the thread end a wedge and un-frayed which is far easier to thread through the eye of a needle
Thread needle front to back (away from user), raise thread end up and into spring to hold it there.
Needle Replacement Procedure
- Loosen Flathead screw, remove worn or damaged needle
- When installing needle, vertical groove faces user, seat needle fully into holder.
- Ensure vertical groove still aligned before tightening
- Tighten flathead screw
- Rethread the needle
Changing a Spool
- Load on new spool
- Cut old spool.
- Tie end of old thread to new thread. Clip any extra and stray material so it does not get caught when you pull it through
- Pull the old thread from the needle side. The new thread will get pulled through the tubing and tensioners automagically
- Cut new thread and rethread the needle
Troubleshooting
Machine Detected a Thread Breakage
Data Button Not Working
See instructions below for Memory Capacity Exceeded Error.
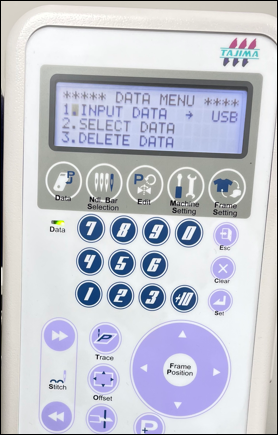
2BA - Memory Capacity Exceeded Error
Clear previous jobs stored in the memory:
- Each time a job is loaded from the USB stick the job is transferred to the internal memory of the Tajima.
- In Memory Mode - Multi, the job is added to the list of jobs.
- In Memory Mode - Single, the new job overwrites the last job held in internal memory.
- When the internal Tajima memory is full a 2BA error will occur after pressing Data and choosing the job file from the USB.
- The 2BA error may occur instantly or near the end of the file load process depending on when the limit is reached.
- If the internal memory is very full, pressing the Data button to pick a USB file will give no response as if the Data button is broken.
- When the Tajima is too full to show the 2BA error, data can be deleted just as if the 2BA error had appeared.
- Press down to select
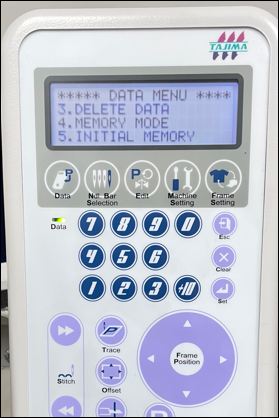
- 3. Delete Data to remove a single job or to
- 5. Initial Memory - to remove all jobs from memory and initialize internal storage
- There is no way to save a list of internal jobs out.
- Keep a copy of your Jobs on a USB stick.
- It is convenient if you are doing multiple jobs in a single session to keep them in internal memory.
- Just remember jobs saved to the Internal Tajima memory may be cleared by the next member using the machine.
- As a curtesy to the next user who may be a beginner and not know about 2BA error, clear the memory at the end of your session
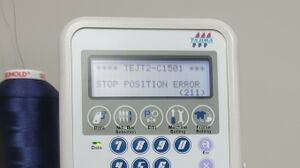
Stop Position Error (211)
A stop position error on the Tajima means that the Tajima stopped unexpectedly potentially due to a collision with the frame. To resolve the error perform the following steps:
- Dismiss the error using the red "O"/Stop key on the keypad.
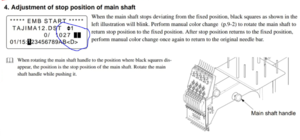
- (Refer to the manual excerpt on the left for the following steps)
- Rotate the main shaft until the circled indicator disappears in the status display
- Perform a manual color change, by selecting a different color using the manual color change keys on the bottom right of the keypad. Once a different color is selected press Set to confirm the manual color change.
- Once the manual color change is complete you may resume your stiching.
If this happens when you first turn the machine on, the TEJT2-C series screen shows after you dismiss the error instead of the EMB START screen. The color change buttons have no effect. Change INITIAL:ON to INITIAL:OFF, then press Set. Follow the steps above to clear the error.
