3D printer, resin (ELEGOO Saturn) ID:170: Difference between revisions
Jump to navigation
Jump to search
(→Documentation: usage pics) |
(→Usage) |
||
| Line 35: | Line 35: | ||
==Usage== | ==Usage== | ||
The leveling card should be near the machine and contains basic build platform leveling instructions. | |||
I was told that ChiTu Box is bad at supports, and to do them in PrusaSlicer (you'll need to find/use/make a resin printer profile) then export your unsliced but supported model as STL for slicing in ChiTu Box. | |||
Below is the usage guide, but can basically be summarized as: | |||
* BE CAREFUL not to damage the 4k LCD screen or FEP plastic film! | |||
* level the build platform | |||
* turn on / heat up cabinet, close doors! | |||
* fill tank with resin choice/color/amount | |||
* software, do your supports/slicing | |||
* cabinet warmed up now? | |||
* insert stick, hit go, leave for a while, check in occasionally for obvious fails | |||
* the build platform won't fit in the [[Curing station (Anycubic Wash and Cure Machine) ID:160]] | |||
* so remove your prints without damaging the build platform and toss them into the basket, see video ^ | |||
* pour unused resin back into bottle - the tank holding stand is good for this | |||
* clean out any remnants from the tank, being careful not to damage the FEP plastic film | |||
* CLEAN UP AFTER YOURSELF | |||
* Think you're done cleaning? THINK AGAIN!! | |||
[[File:Saturn1.JPG]] | [[File:Saturn1.JPG]] | ||
[[File:Saturn2.JPG]] | [[File:Saturn2.JPG]] | ||
| Line 46: | Line 67: | ||
==Troubleshooting== | ==Troubleshooting== | ||
TBD | TBD | ||
Revision as of 06:15, 5 March 2023
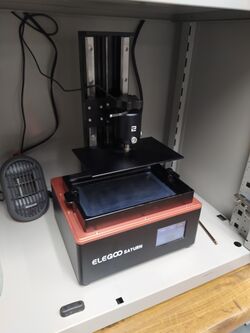 | |
| Type | ELEGOO Saturn Resin 3D Printer |
| Make/Model | ELEGOO Saturn |
| Serial number | ?? |
| Original owner | ?? |
| Loan status | ?? |
| Arrival date | ?? |
| Location | 3D Printer Village |
| Functional status | Functional |
| Usage permissions | None |
| Certification | None |
| Wiki-ID | [[]] |
| Label | 1.0" 1.5" 2.0" |
https://www.elegoo.com/en-ca/products/elegoo-saturn-4k-mono-lcd-3d-printer
Specs
- System: EL3D-3.0.1
- Operation: 3.5 Inch Touch Screen
- Slicer Software: Chitu DLP Slicer
- Connectivity: USB
- Technology: LCD UV Photocuring
- Lightsource: UV Integrated LED lights (wavelenth 405nm)
- XY Resolution: 0.05mm(3840*2400)
- Z Axis Accuracy: 0.00125mm
- Layer Thickness: 0.01-0.15mm
- Printing Speed: 30-40mm/h
- Power Requirements: 110-240V 50/60Hz 24V4A 96W
- Printer Dimensions: 11.02in (L) * 9.44in (W) * 17.55in (H) 28cm(L) *24cm (W) * 44.6cm (H)
- Build Volume: 7.55in (L) * 4.72in (W) * 7.87in (H) 192mm (L) * 120mm(W) * 200mm (H)
- Weight: 22 Lbs (10 Kg)
Usage
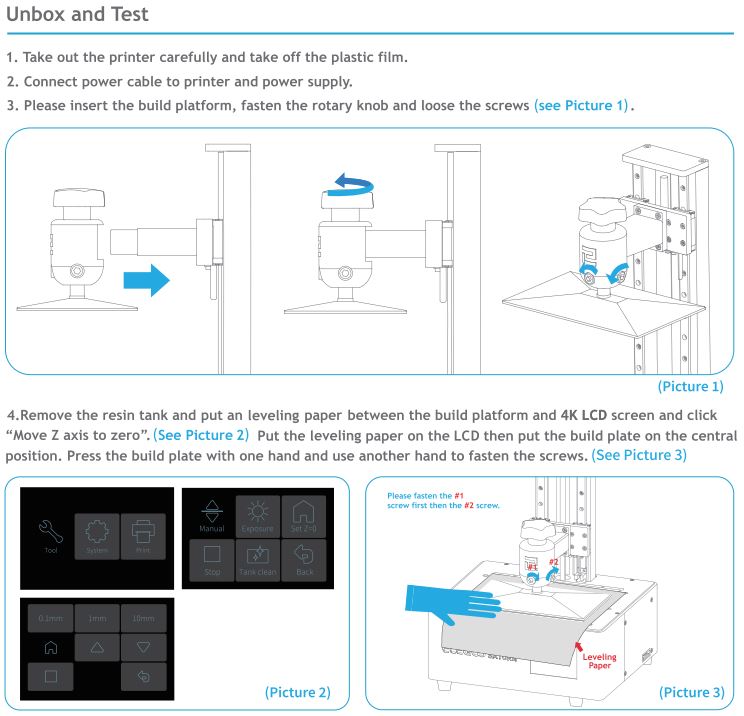
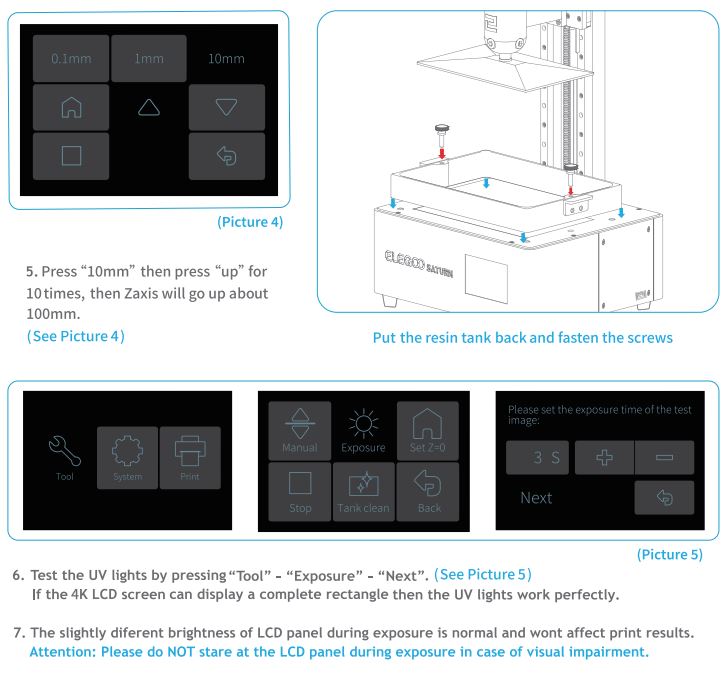
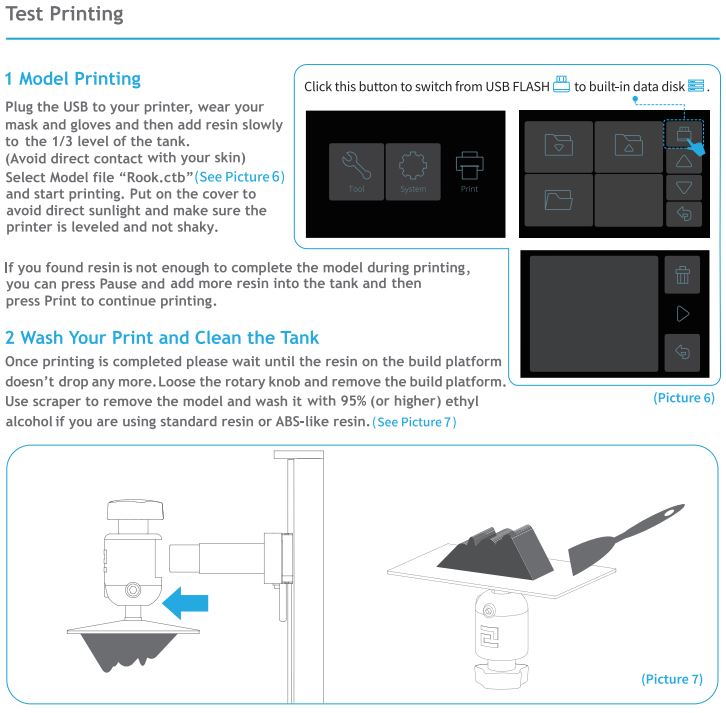
The leveling card should be near the machine and contains basic build platform leveling instructions.
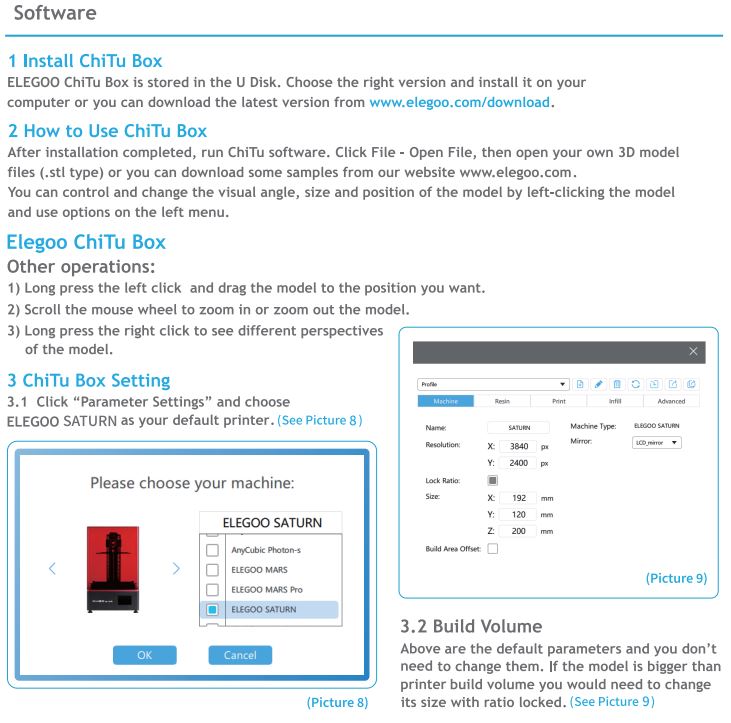
I was told that ChiTu Box is bad at supports, and to do them in PrusaSlicer (you'll need to find/use/make a resin printer profile) then export your unsliced but supported model as STL for slicing in ChiTu Box.
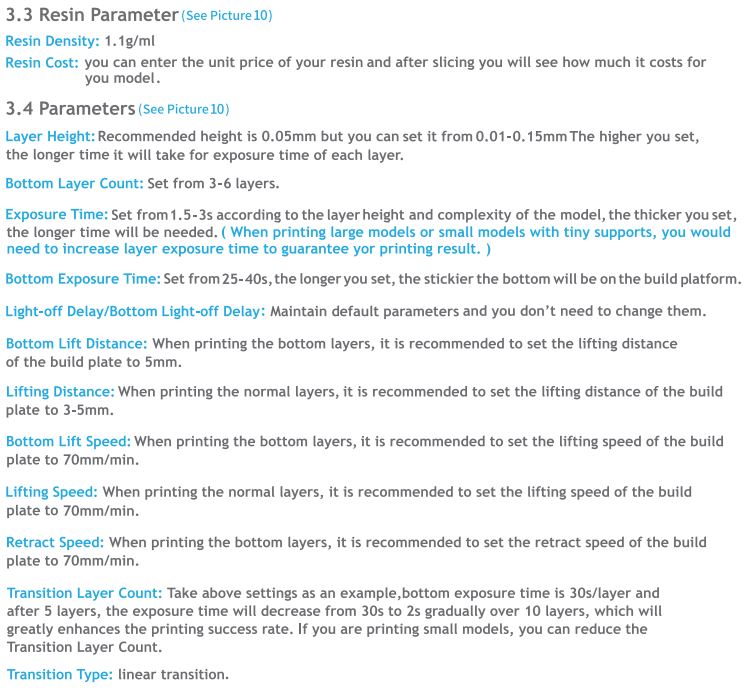
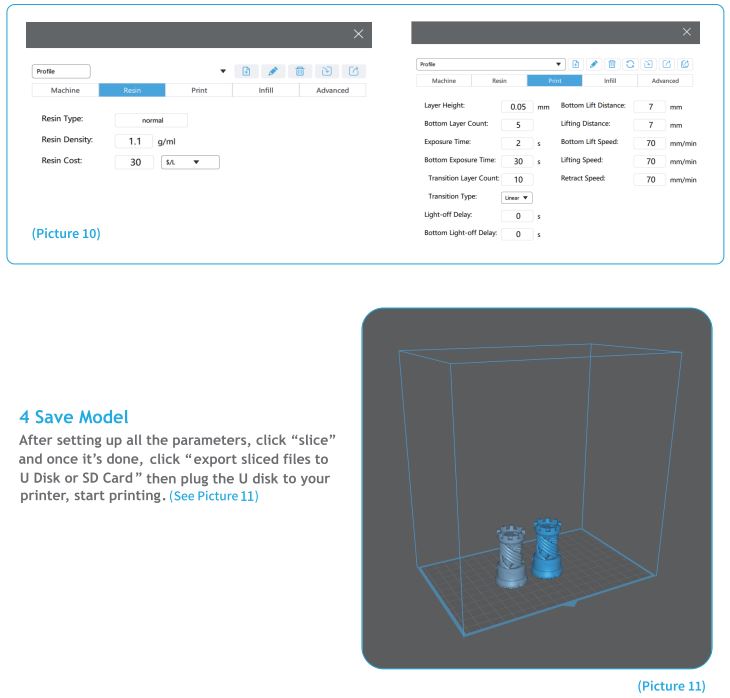
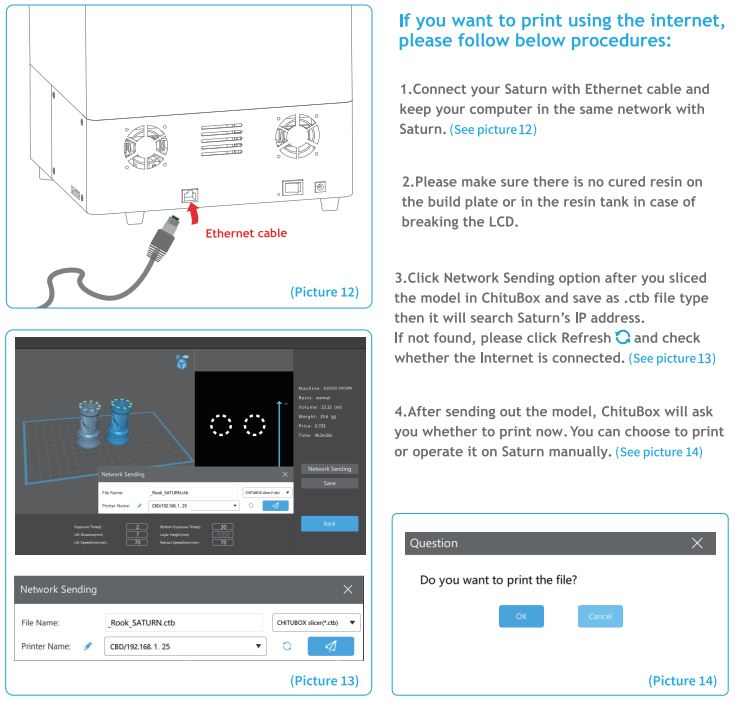
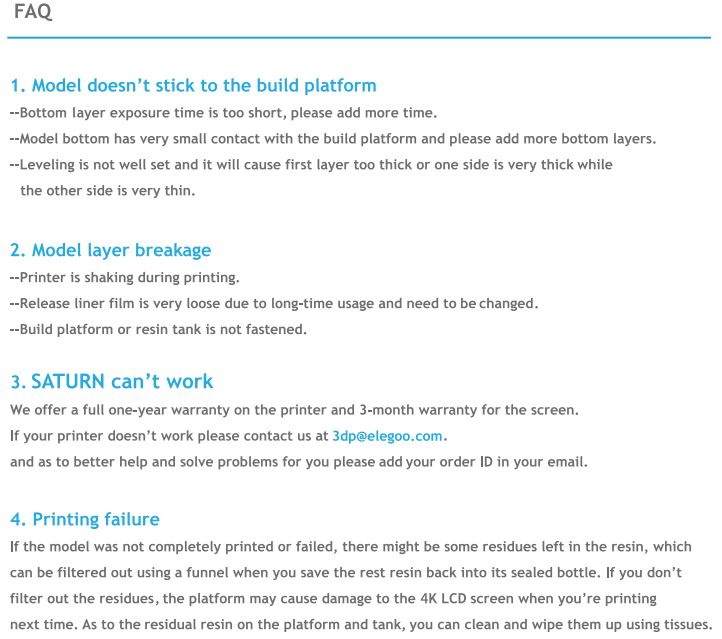
Below is the usage guide, but can basically be summarized as:
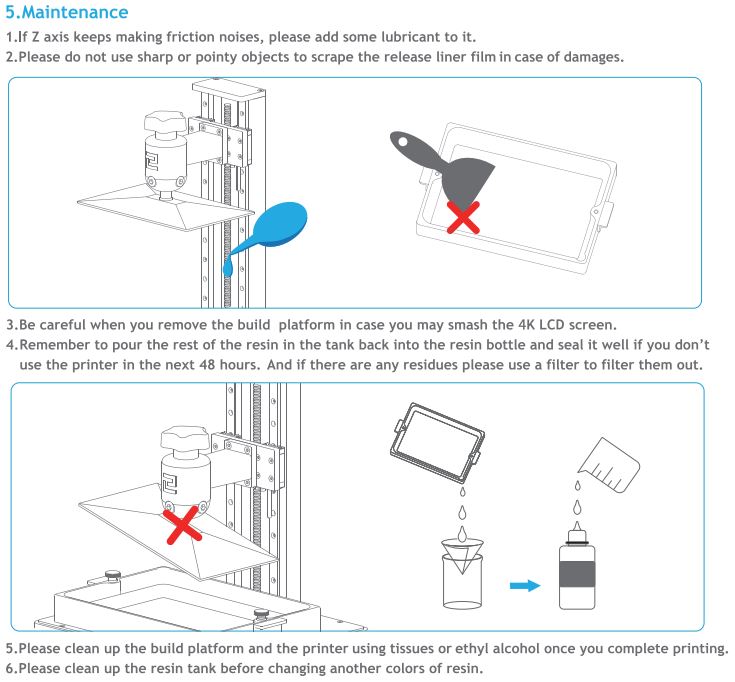
- BE CAREFUL not to damage the 4k LCD screen or FEP plastic film!
- level the build platform
- turn on / heat up cabinet, close doors!
- fill tank with resin choice/color/amount
- software, do your supports/slicing
- cabinet warmed up now?
- insert stick, hit go, leave for a while, check in occasionally for obvious fails
- the build platform won't fit in the Curing station (Anycubic Wash and Cure Machine) ID:160
- so remove your prints without damaging the build platform and toss them into the basket, see video ^
- pour unused resin back into bottle - the tank holding stand is good for this
- clean out any remnants from the tank, being careful not to damage the FEP plastic film
- CLEAN UP AFTER YOURSELF
- Think you're done cleaning? THINK AGAIN!!
Troubleshooting
TBD
