143: Difference between revisions
Pat.spencer (talk | contribs) (Created page with "{Equipment page | toolname = LongMill Wood CNC | model = Industrial | serial = N/A | owner =Protospace | loanstatus =Current | arrived =Oct 28th, 2021 | location = Wood Shop |...") |
(No difference)
|
Revision as of 22:11, 1 November 2021
{Equipment page | toolname = LongMill Wood CNC | model = Industrial | serial = N/A | owner =Protospace | loanstatus =Current | arrived =Oct 28th, 2021 | location = Wood Shop | status = Waiting for training material | permission = Members & Friends Only | certification = Must complete CNC-LongMill Certification
| photo=
| id=143
}}
Update: (11/1/2021)
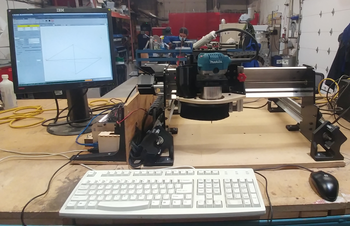
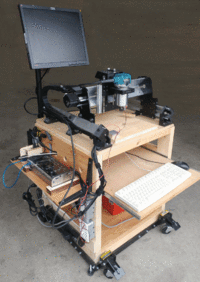
The LongMill has been installed on the shelf in the "Large Projects" area, along side of the MiniCNC.==
Machine Overview
This is a SCENCI (pronounced "CNC") Labs LongMill ( See https://sienci.com/product/longmill/ ) with the short rails. The web page says it is 12"x12" but in fact it is more like 10"x13". The controller is an Arduino running GRBL.
Bed size: 250mm x 340mm (10"x 13")
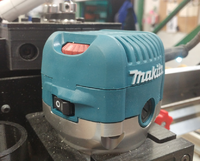
Spindle: Makita Trim Router Model RT0701C ( https://www.makitatools.com/products/details/RT0701C). This has a 1/4" collet and a variable speed spindle from 10,000 to 30,000 RPM. It is manually controlled (Not controlled in GRBL). There is a collection of bits in the red toolbox under the CNC.
Currently, the Spindle power is not controlled by the CNC Controller and must be turned On/Off manually. This is on the list of improvements.
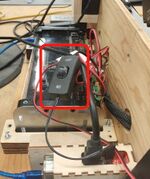
Machine Control: GRBL on a SIENCI Milling Labs Controller.
User Interface: a RaspBerry PI is connected to the Controller via USB. It has Universal G-Code Sender (UGCS) as well as bCNC installed.
RaspPi Login: It is autologon on startup, so you do not need to log on. But if you need it for any reason, it is pi/Protospace.
Hold down method: Screws, nails, clamps(must make these).
Note that the base plate mounting board is MDF but IS NOT A SACRIFICIAL BOARD. The mounting board has threaded inserts on a 10cm x 10cm grid. You can supply your own hold down board with whatever system you wish. Simply drill holes in your board so that you can mount it to these threaded inserts. The threaded inserts are 10x24. There are a sample supply of different length screws for you to use.
Dust collection?: Yes, requires a ShopVac. Probing: plate style. Plate is 10mm thick as well as X and Y 10mm offset.
Suitable stock materials: Wood, plastics, foams, other.
Unsuitable stock materials: Zero metal, metal alloy, or metal composites are to be cut on this. If the CNC machine was on the rolling cart, it possibly could be moved outside to do some aluminum milling, but for now don't do it.
Instructions and Training
How to turn on the machine
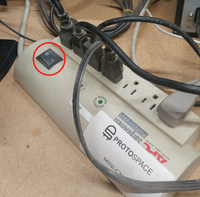
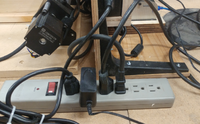
The main power is turned on by turning on the common power bar for the shelf. This also turns on the lights as well as power for the MiniCNC
There are 2 power switches to be turned on (not counting the monitor).
- The Raspberry Pi has it's own wall wart with a switch.
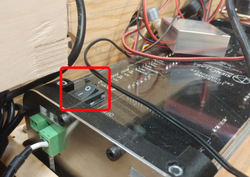
- The SCENCI Longboard has a power switch.
- And finally, when you want to start the Router, you also need to turn on the switch on the router. (Note: that this will be put on a more convenient switch and even maybe software control in the near future. )
Once the power is turned on, you will see the Desktop on the Raspberry PI. You now need to launch one of the programs that will talk to the Controller.
- UGCS Platform (Universal G-Code Sender Platform), ( https://all3dp.com/2/universal-gcode-sender/ )
- bCNC ( https://github.com/vlachoudis/bCNC#readme )
UGCS is written in Java, and bCNC is a Python program. I refer bCNC and will document that here.
How to Jog and position the Router:
The LongMill does not have travel switches. ( https://resources.sienci.com/view/lm-adding-limit-switches/ ) Instead, you manually jog the router to a position that you wish to use as a starting point, and then zero the XYZ references.
There is also a touch plate to assist in getting precise Z (as well as X and Y) references for you particular material.
Reference links
CNC Basics - What You Need To Get Started -> https://www.youtube.com/watch?v=lQ-MYnyxh7M (Has a LongMill in the demo)
CNC Basics - Make Your First Cut -> https://www.youtube.com/watch?v=_Rt5sC9DrEQ&t=297s
Planned Updates
- Add Power Switch for Router Power
- Add E-Stop switch
- Add e-relay for Router Power (Power control in G-Code)
- Add Travel Switches.
Tool history
The LongMill CNC was donated by Peter Carless. He built the stand as well as the shelf and power bars for the electronics.
The first training session has yet to be held at the date of writing
